- Caulk Not Sticking to Shower Tile: Causes and a Lasting Fix
- Why the Caulk Isn’t Sticking
- Invisible contamination is the most common cause
- Silicone residue: a chemistry problem, not a technique problem
- Moisture in the joint undermines adhesion and invites mold
- Tile type, coatings, and acrylic or fiberglass tubs behave differently
- Choosing the wrong sealant chemistry for the joint
- Bead size, two-sided adhesion, and backer rod
- Movement between the tub and tile can defeat any sealant
- How Long Different Sealants Actually Take to Cure
- Removal and Reapplication, Step by Step
- Mistakes That Cause a Second Failure
- When It’s a Structural Problem, Not a Caulking Problem
- Frequently Asked Questions
- Sources
If you’ve ever run a perfect bead of caulk along your shower tile only to watch it peel, crack, or lift away in one rubbery strip days later, you’re not alone — and caulk not sticking to shower tile is rarely about effort. It’s usually about diagnosis. Caulk failure in a shower isn’t one problem. It’s a handful of different problems that all look the same from the outside: a bead that won’t grip glossy tile, one that lifts at the edges, one that goes soft and sticky instead of curing, or one that keeps tearing away from the same spot no matter how many times you redo it.
Most DIY recaulking jobs fail because the real cause usually isn’t visible. A few things to watch for:
- Invisible contamination — soap film, body oil, or a thin layer of leftover silicone residue can sit on a surface that looks perfectly clean
- Hidden moisture — trapped in the joint, or even behind the tile itself, it can quietly undermine a bead that seemed to go on fine
- Movement — flex between the tub or shower base and the tile will tear a bead apart no matter how well it was applied, and no amount of better prep will fix it
- Something behind the wall — sometimes the caulk isn’t the real problem at all, but a symptom of a leak or substrate failure further in
In this guide, we’ll start with a quick diagnosis table to match what you’re seeing to the likely cause, then walk through each one in detail: surface prep and contamination, moisture and dry-time, choosing the right sealant chemistry, bead size and backer rod, and joint movement. From there, we’ll cover how to remove and reapply caulk so it actually holds, the mistakes that cause a second failure, and how to tell the difference between a weekend fix and a problem that needs a professional.
Caulk Not Sticking to Shower Tile: Causes and a Lasting Fix
Start here: match the symptom to the cause
Before touching a caulk gun again, it helps to know which of six failure modes is actually in play. Contamination, residue, moisture, substrate mismatch, wrong sealant, and movement all produce similar-looking failures but need completely different fixes.
| Symptom | Most likely cause | First thing to check |
| Bead lifts cleanly off tile in one piece | Contamination (soap film, oil, dust) | Wipe the joint edge with isopropyl alcohol on a white cloth — if it comes away tinted, the surface wasn’t clean |
| New caulk won’t grip old caulk at all | Silicone residue or caulking directly over old silicone | Look for a thin, shiny film on the surface even after scraping |
| Bead separates only at one wall or corner | Movement between tub/shower base and tile | Press on the tub floor — if it flexes or creaks, movement is pulling the joint apart |
| Caulk stays soft, tacky, or sticky | Incomplete cure or trapped moisture | Check how long it’s actually been—most silicones need a full 24 hours |
| Peeling on an acrylic or fiberglass tub specifically | Wrong sealant chemistry for that substrate | Check the tube label for acrylic/fiberglass compatibility |
| Bubbles or blisters in the bead | Moisture trapped under the caulk during application | Feel behind the tile or under the tub lip for dampness |
Why the Caulk Isn’t Sticking
Invisible contamination is the most common cause
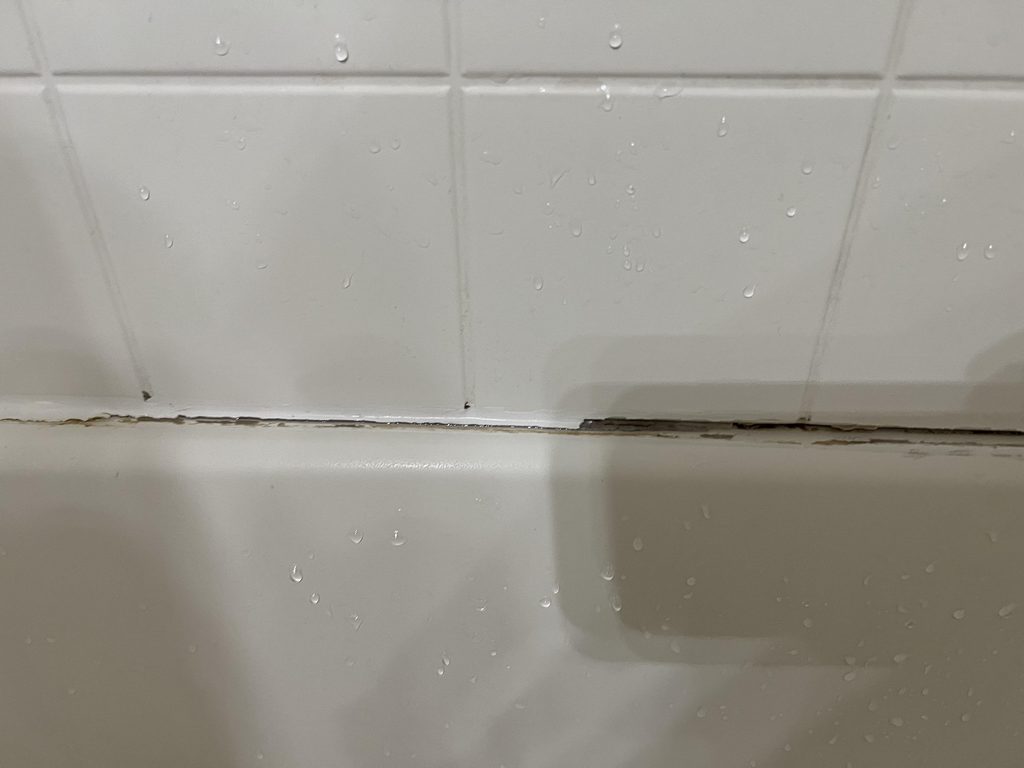
Soap scum, body oil, and cleaner residue don’t need to be visible to ruin adhesion. A film only a few molecules thick is enough to stop a sealant from bonding to the tile underneath it — which is why a joint that “looked clean” at application is still the number one reason a new bead fails within days.
Silicone residue: a chemistry problem, not a technique problem
New caulk generally won’t bond to old silicone caulk, because nothing sticks to silicone—not paint, not new caulking products, not even silicone to itself. Silicone contains oils that gradually migrate out of the cured bead over time, leaving a film on the surface that blocks adhesion. That’s also why applying fresh silicone directly over an old bead is generally discouraged: it won’t bond reliably, and any residue left behind from an incomplete removal is a common cause of the new caulk failing too.
Moisture in the joint undermines adhesion and invites mold
Caulking over a damp surface is a near-guaranteed second failure. Moisture on the surface can prevent a new sealant from curing and bonding properly, which is why professionals often recommend waiting several hours after cleaning for all moisture to fully evaporate before applying caulk. This matters beyond adhesion, too: mold growth can begin within 24 to 48 hours after a surface stays wet, and indoor humidity is best kept below 60%, ideally between 30 and 50%.
Tile type, coatings, and acrylic or fiberglass tubs behave differently
Glazed tile, sealed stone, and acrylic or fiberglass tub surrounds each have their own quirks—and acrylic is a known trouble spot. Contractor reports describe silicone failing to stick to acrylic tub surfaces at all, sometimes peeling off in one continuous piece like a gasket. Manufacturers describe acrylic and similar plastics as substrates that need separate evaluation before sealing. On acrylic and fiberglass specifically, checking the tube for an explicit acrylic/fiberglass compatibility claim isn’t optional.
Choosing the wrong sealant chemistry for the joint
Manufacturer application data for a kitchen-and-bath silicone specifies that the surface must be clean, dry, structurally sound, and free of foreign material before application, and separately warns that it’s not recommended on substrates that might bleed oils, plasticizers, or solvents—including materials like polypropylene, polyethylene, or polycarbonate—without evaluating the substrate first.
Bead size, two-sided adhesion, and backer rod
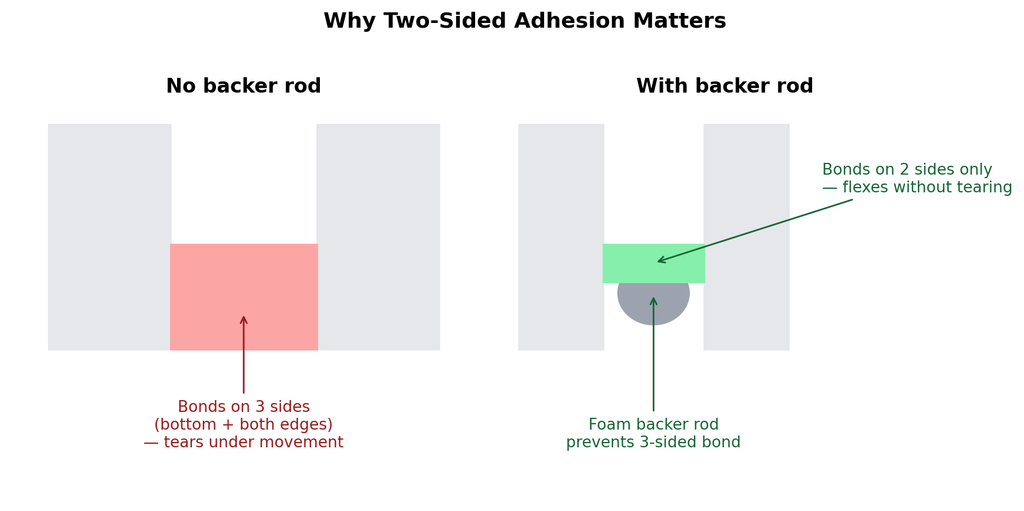
A joint that’s too wide or too deep for the sealant alone will fail even with perfect prep. Manufacturer guidance sets a practical limit: joint width shouldn’t exceed about half an inch, and if the depth exceeds that, a foam backer rod should be used underneath the sealant. Backer rod stops the bead from bonding to the bottom of the joint, so it can flex on two sides instead of three.
Movement between the tub and tile can defeat any sealant
Sometimes the caulk was applied correctly and the substrate is simply moving underneath it. Tub flex under load is a documented failure mode: one detailed report describes an acrylic tub’s lip pulling away from the caulked tile line whenever the tub filled with roughly 400 pounds of water, then settling back into place once drained. No sealant holds up long-term against that kind of repeated structural flex — the fix is addressing the support under the tub, not re-caulking a third time.
How Long Different Sealants Actually Take to Cure
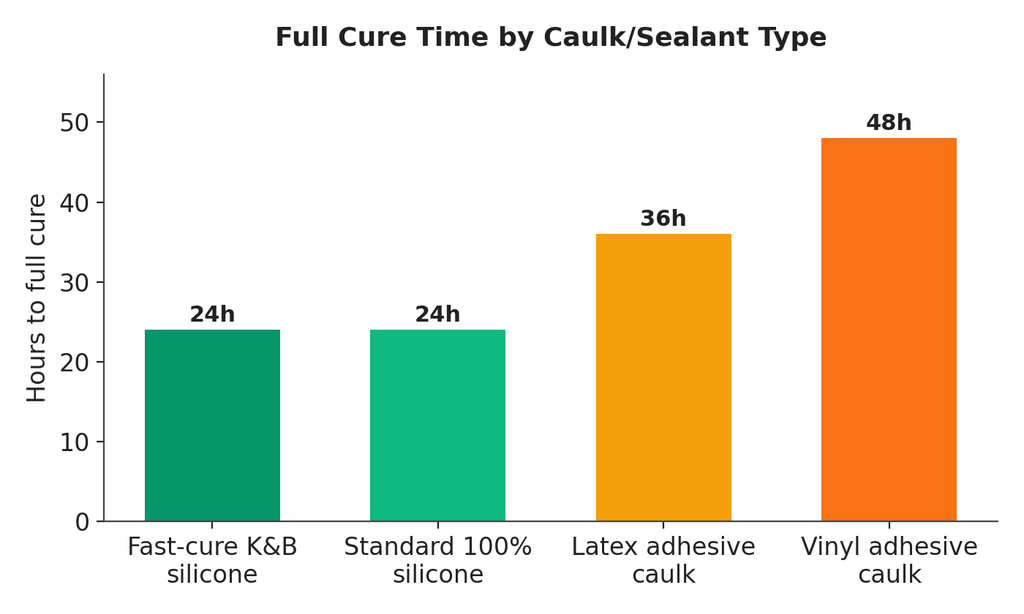
Cure time is the variable most DIYers underestimate. Some kitchen-and-bath formulas are water-resistant in as little as 30 minutes but still need a full day to reach complete cure, while other adhesive caulk chemistries take considerably longer. Running water before that window closes is one of the most common reasons a bead looks fine on day one and fails on day three.
Removal and Reapplication, Step by Step
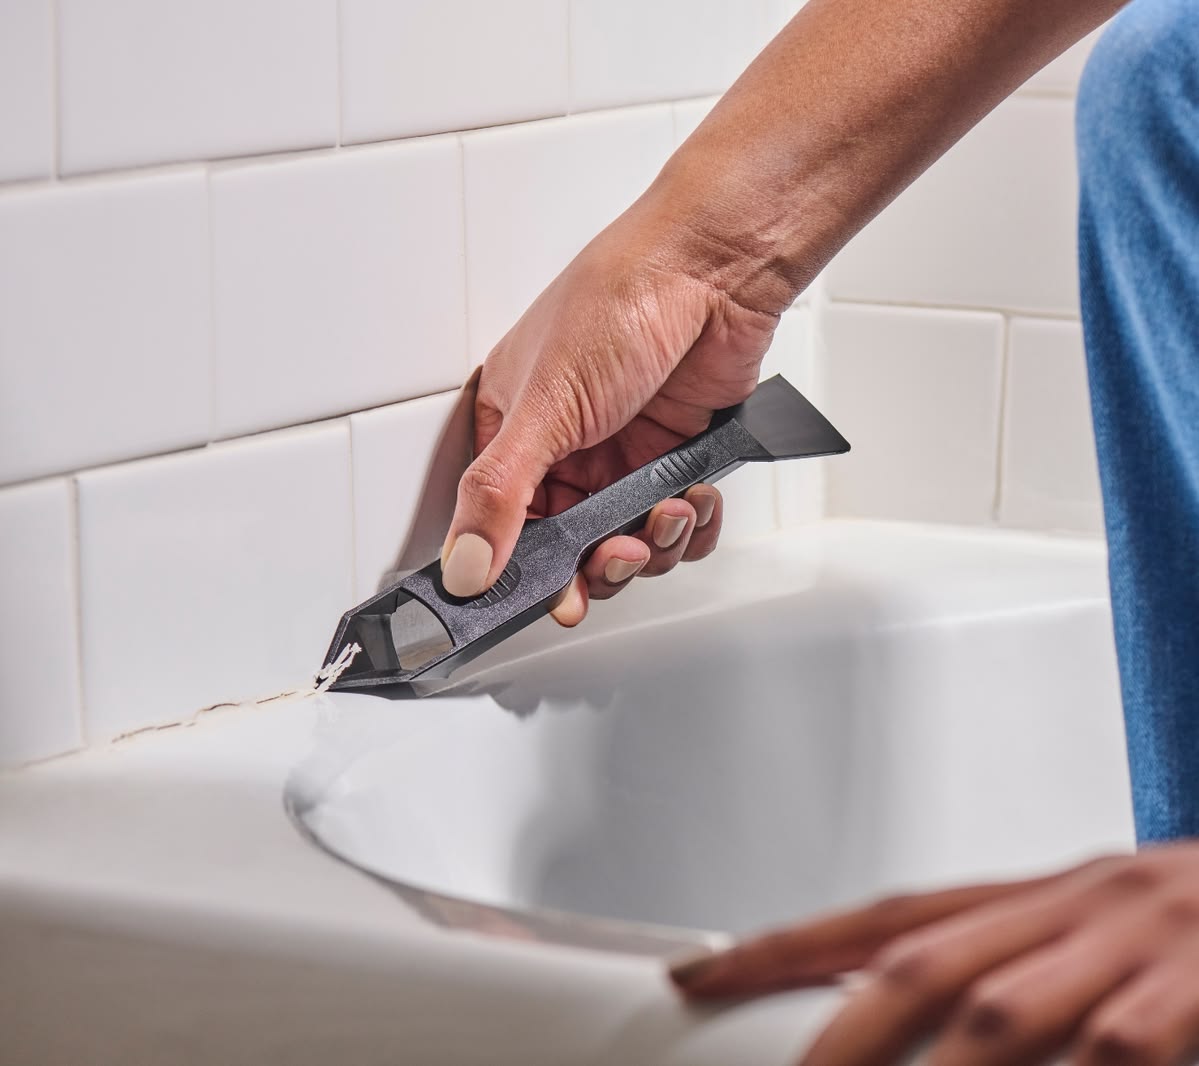
- STEP 1. Strip the residue, not just the bead. Follow with isopropyl alcohol or a dedicated silicone remover on both sides of the joint.
- STEP 2. Cut and remove the old bead. Slice along both edges with a utility knife at a shallow angle, then peel the bead out in strips.
- STEP 3. Let it fully dry. Give the joint several hours of open air, longer in a humid bathroom.
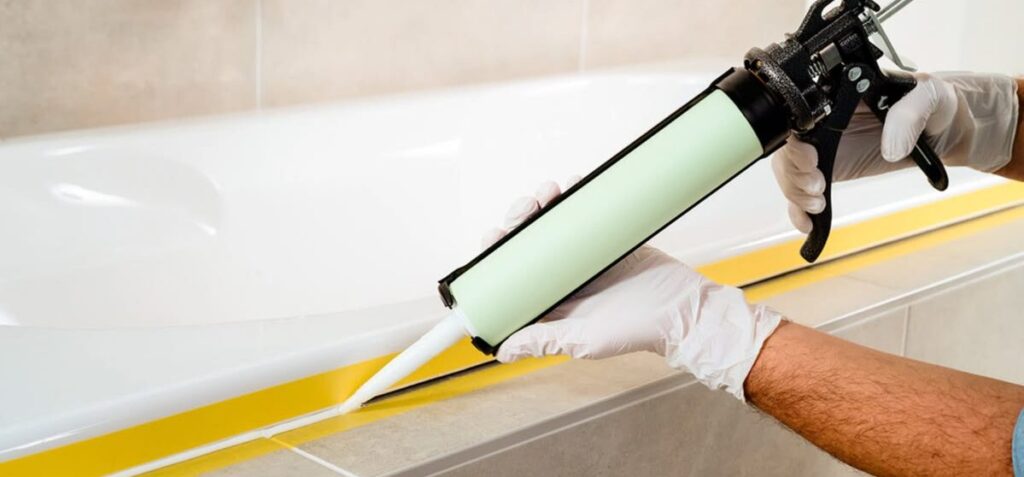
- STEP 4. Mask both sides with painter’s tape for a clean, consistent line.
- STEP 5. Choose the right product — 100% silicone or a purpose-built kitchen-and-bath sealant rated for both surfaces.
- STEP 6. Apply a continuous bead, sized to the joint and backed with foam rod if wider or deeper than about a quarter to a half inch.
- STEP 7. Tool it once, smoothly, before it skins over, then remove the tape before the surface skins.
- STEP 8. Cure before wetting. Respect the specific product’s full-cure window, not just its tack-free time.
Mistakes That Cause a Second Failure
- Wiping with a cloth instead of alcohol, which spreads residue instead of removing it
- Caulking the same day as cleaning without letting the joint dry
- Using a general-purpose acrylic caulk on a joint that needs 100% silicone
- Skipping backer rod on a joint wider than about a half inch
- Running water in the shower before the cure window is up
- Re-caulking over old silicone instead of stripping it first
When It’s a Structural Problem, Not a Caulking Problem
If the bead keeps failing in the exact same spot no matter how carefully it’s redone, or the gap reappears specifically when the tub is full and closes when it’s drained, that points to structural movement, a loose tub installation, or a leak behind the wall — not a caulking mistake. Re-caulking at that point is a temporary cover, not a fix. It’s worth having a contractor check the support under the tub or the wall condition behind the tile before redoing the joint a third time.
Frequently Asked Questions
Not reliably. New caulk generally won’t bond to old silicone, so the old bead — and the residue film it leaves behind — needs to come off first.
Long enough that no moisture remains on or behind the surface — often several hours after cleaning, more in a humid bathroom.
Most often this is exposure to water before the cure finished, contamination missed during prep, or a gap too wide for the bead to bridge without backer rod.
Sources
- Sashco — Will My New Caulk Stick to Silicone? (sashco.com)
- DAP — Silicone Plus Kitchen & Bath Sealant technical data bulletin (dap.ca)
- DAP — 3.0 Kitchen, Bath & Plumbing Caulk product data (dap.com)
- US EPA — A Brief Guide to Mold, Moisture and Your Home (epa.gov)
- FineHomebuilding.com forum threads on acrylic tub movement and caulking
- FixDaily’s saved US Google Trends exports (grout repair, weatherstripping, drywall)
Note: the two charts above use FixDaily’s own saved Trends data and published manufacturer cure-time specifications. Editorial/lifestyle photography (bead application, tool close-ups, bathroom shots) should be sourced from a licensed stock library or FixDaily’s own photo shoot before publishing — third-party web images aren’t included here for copyright reasons.