
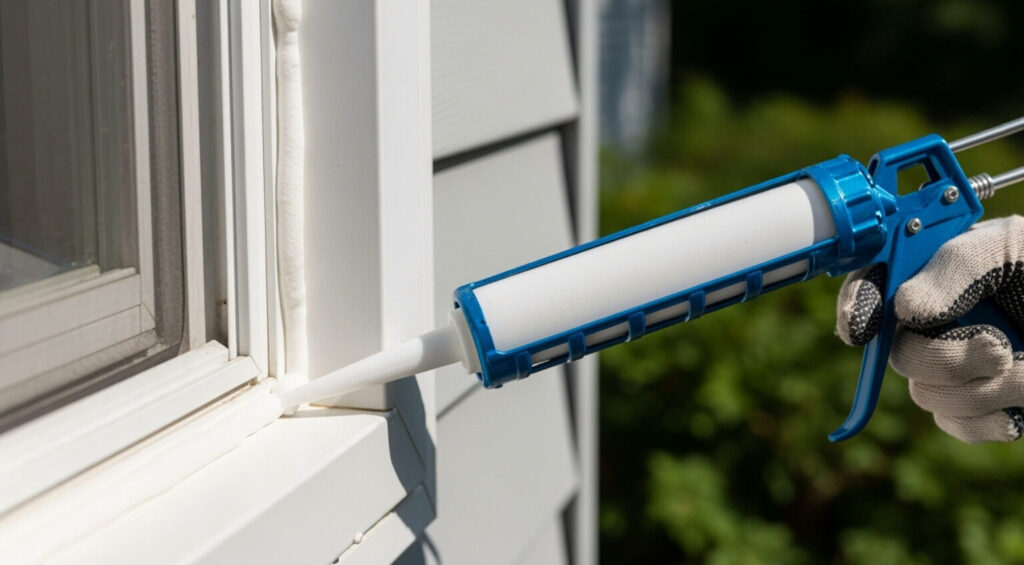
Caulking may look like a small finishing job, but the right seal can prevent water, drafts and insects from passing through gaps around your home. This beginner’s guide explains how caulk works, how to select the right type and how to apply a clean bead without making a mess
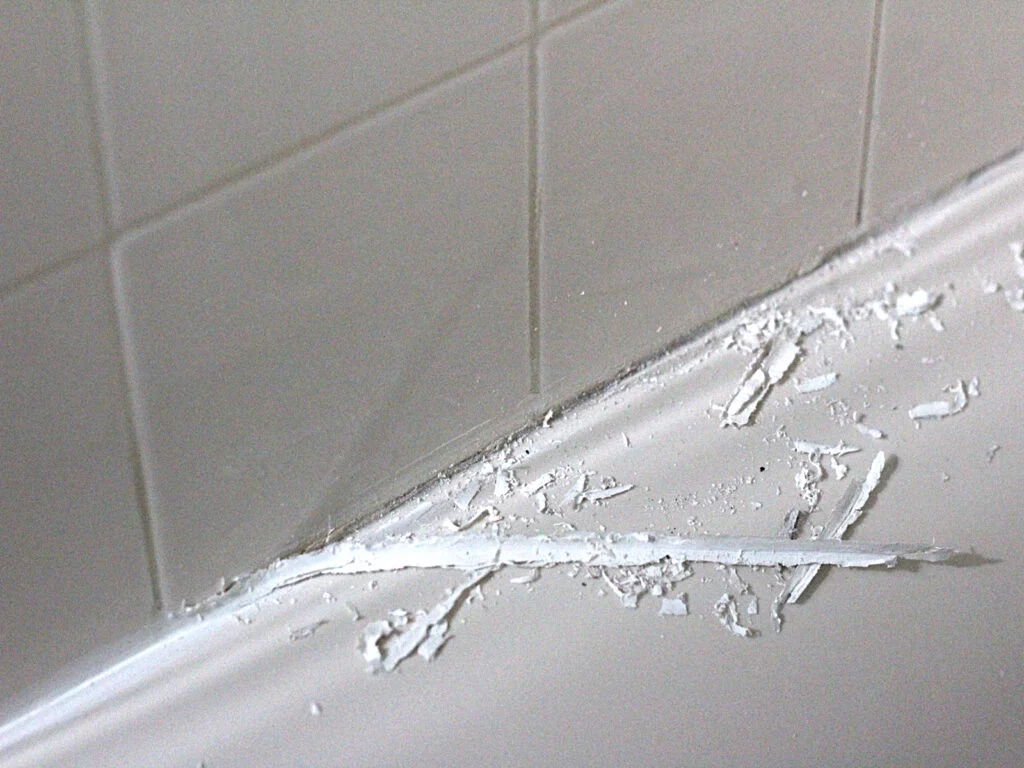
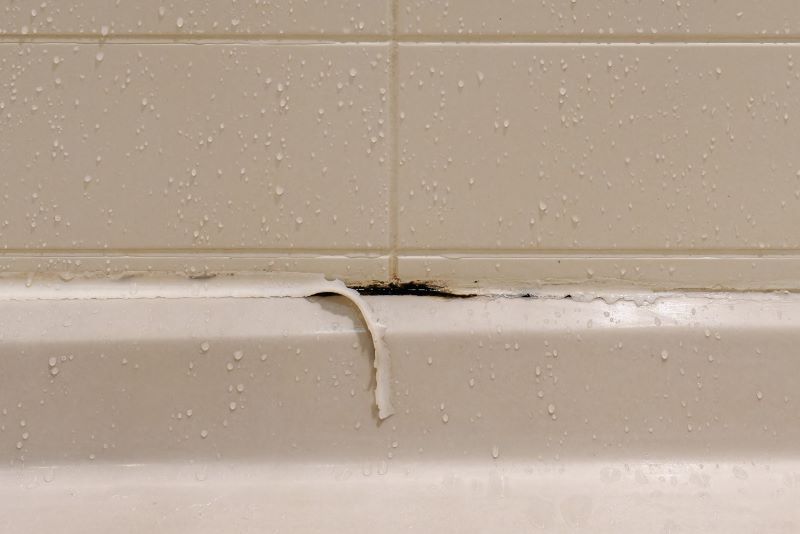
Two photos, one problem at two stages. The first shows caulk that has dried out, gone brittle, and started cracking and flaking off the tub edge. The second shows the next step, where the caulk has peeled up completely, leaving a gap with water sitting in it and a dark mildew stain forming underneath. Together they show why cracked caulk shouldn’t just be left alone, it turns into a peeled, leaking, moldy seam if it is.
What Is Caulking?
Caulking is the process of sealing a small gap or joint between two surfaces with a flexible material called caulk or sealant. These gaps can appear around bathtubs, showers, sinks, countertops, windows, doors, baseboards, trim, pipes and exterior siding.
A home is made from many different materials. Wood, tile, glass, metal, plastic, brick and concrete do not all move in the same way. They can expand in warm weather, shrink in cold weather, settle over time or move slightly during normal use. Caulk is designed to fill suitable small joints while allowing some movement, helping the seal stay in place.
Why Caulking Matters
Water is one of the main reasons caulking matters. A small opening around a bathtub, shower or sink can allow water to move behind the visible surface. If this happens repeatedly, nearby materials may become damaged. Paint can peel, wood can swell or rot, and mold may grow where moisture stays hidden.
Caulking can also help prevent insects from entering through small openings around trim, pipes and exterior materials. Although caulk will not solve every pest problem, it can close suitable entry points and improve the finish of the area.
Eventually, caulking enhances the appearance of a home. A clean bead can hide narrow spaces between a wall and baseboard, trim and wall, or countertop and backsplash. It gives the area a smoother and more finished look.
Why Every Homeowner Should Understand Caulking?
Caulking is one of the most useful home-maintenance skills because many small repairs can be done with basic tools and careful preparation. It does not require advanced construction experience, but it does require patience. The best results come from choosing a product made for the job, removing failed material, cleaning the surfaces, applying a controlled bead and allowing it to cure fully.
Important: Caulk can seal an appropriate joint, but it cannot repair a leaking pipe, rotten wood, loose tile, missing flashing or failed shower waterproofing. If the area is wet, soft, swollen or repeatedly damaged, find the real cause before covering the gap.
The Important Job Caulk Does
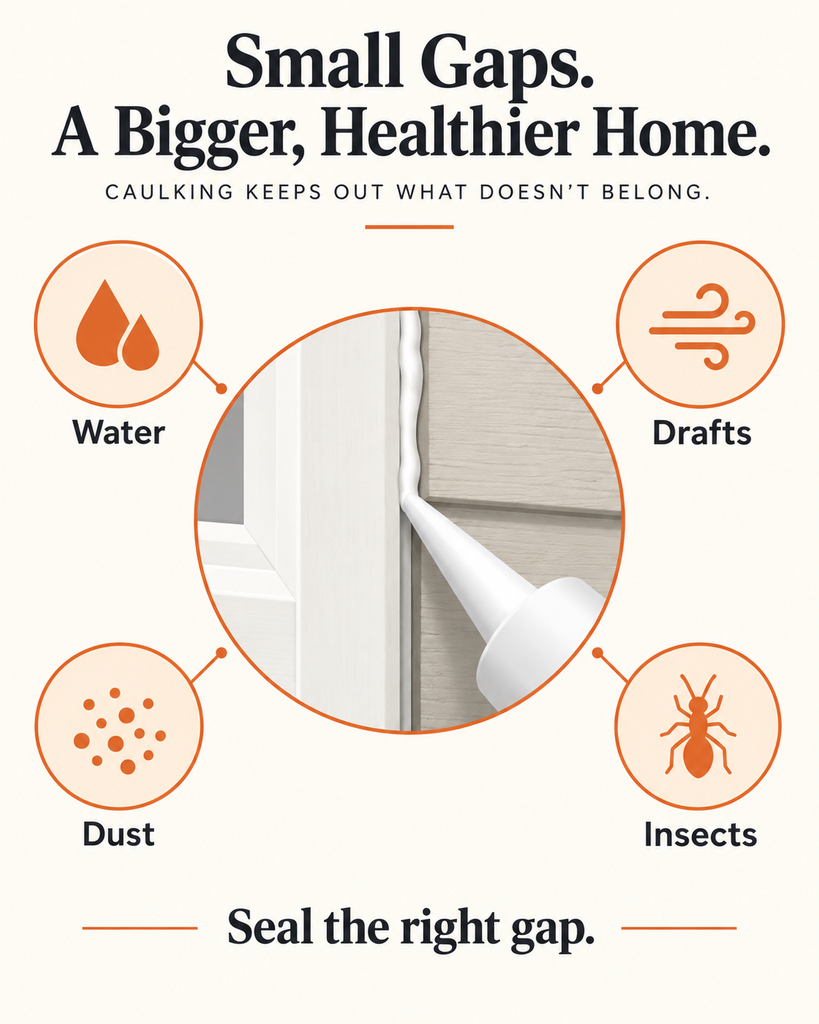
Caulk does more than make a gap look clean. It seals small spaces where two parts of your home meet, such as a bathtub and tile, a sink and countertop, or a window frame and wall.
Caulk helps protect your home by:
- Keeping water out of gaps around showers, tubs, sinks, and countertops.
- Reducing drafts around suitable windows, doors, trim, and pipes.
- Helping block dust and insects from entering through small openings.
- Giving joints a clean, smooth, finished look.
Use caulk only in the right places. Do not seal window drainage holes, because they allow water to escape. Caulk also cannot fix a leaking pipe, rotten wood, loose tile, or damaged waterproofing.
Why Caulk Is Flexible
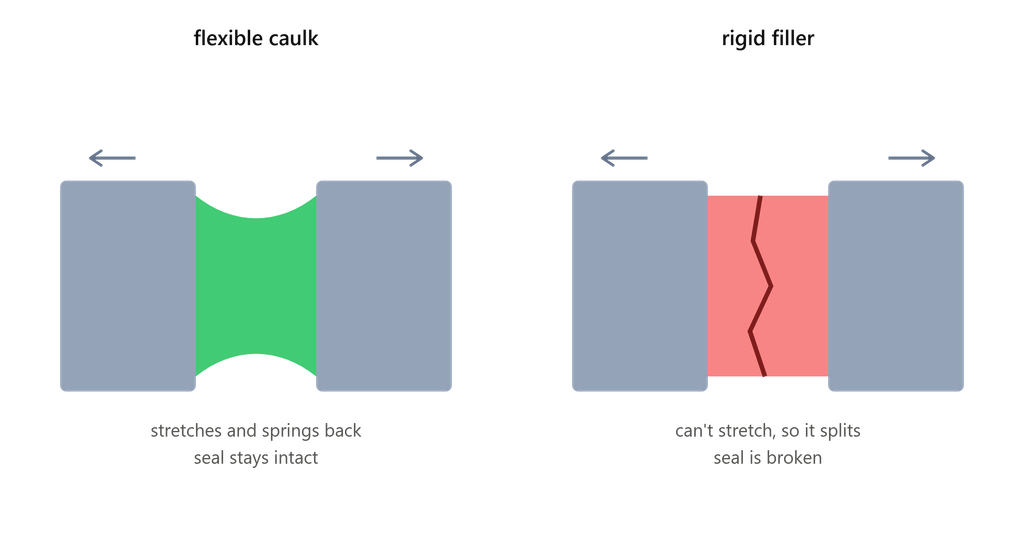
Here’s where it gets a little more interesting than you’d expect. Not all gap fillers are created equal, and mixing them up is one of the most common rookie mistakes.
Think about wood filler or spackle for a second. Once that stuff dries, it’s basically rock. Great for a nail hole in a wall that never moves. Terrible for a seam that does move, like the one around your bathtub or window frame. And here’s the thing nobody tells you: your house is moving all the time. Not in a scary earthquake way, just tiny shifts from temperature changes, humidity, and everyday settling. A rigid filler in a joint like that eventually cracks, because it simply cannot bend.
Caulk was built to solve exactly that problem. It stays soft and stretchy even after it cures, so it moves right along with the gap instead of fighting it. That flexibility is the entire reason caulk exists as its own category of product instead of everyone just using spackle everywhere.
Different Jobs Need Different Caulk
Plot twist: sometimes caulk isn’t even trying to keep water out. Sometimes its whole job is just to look nice.
If you’re caulking a baseboard before painting, that bead is purely cosmetic. It hides an ugly seam and gives you a crisp, painted edge. It never has to fight off water or humidity, so a basic, paintable acrylic caulk handles it easily.
But around a shower, tub, sink, or an exterior window, caulk is doing real, high-stakes waterproofing work. That’s a completely different assignment, and it calls for a flexible, water-resistant silicone product built to expand and contract without ever letting water sneak through.
This is exactly where beginners get burned. Using a cheap, paintable caulk in a wet shower seam might look fine for a few weeks. Then it fails, water gets behind the tile, and suddenly you’re not dealing with a five-minute touch-up anymore, you’re dealing with a wall that needs to be torn open.
The takeaway
That thin white line in your bathroom isn’t decoration. It’s a small, flexible barrier standing between you and water damage, drafts, dust, and uninvited bugs, and it only works if you use the right type for the right job.
Next time you see a caulk line starting to crack or peel, don’t just glance past it. That’s your house quietly asking for a five-minute fix before it turns into a much bigger one.
What Does Caulk Do Around a Home?
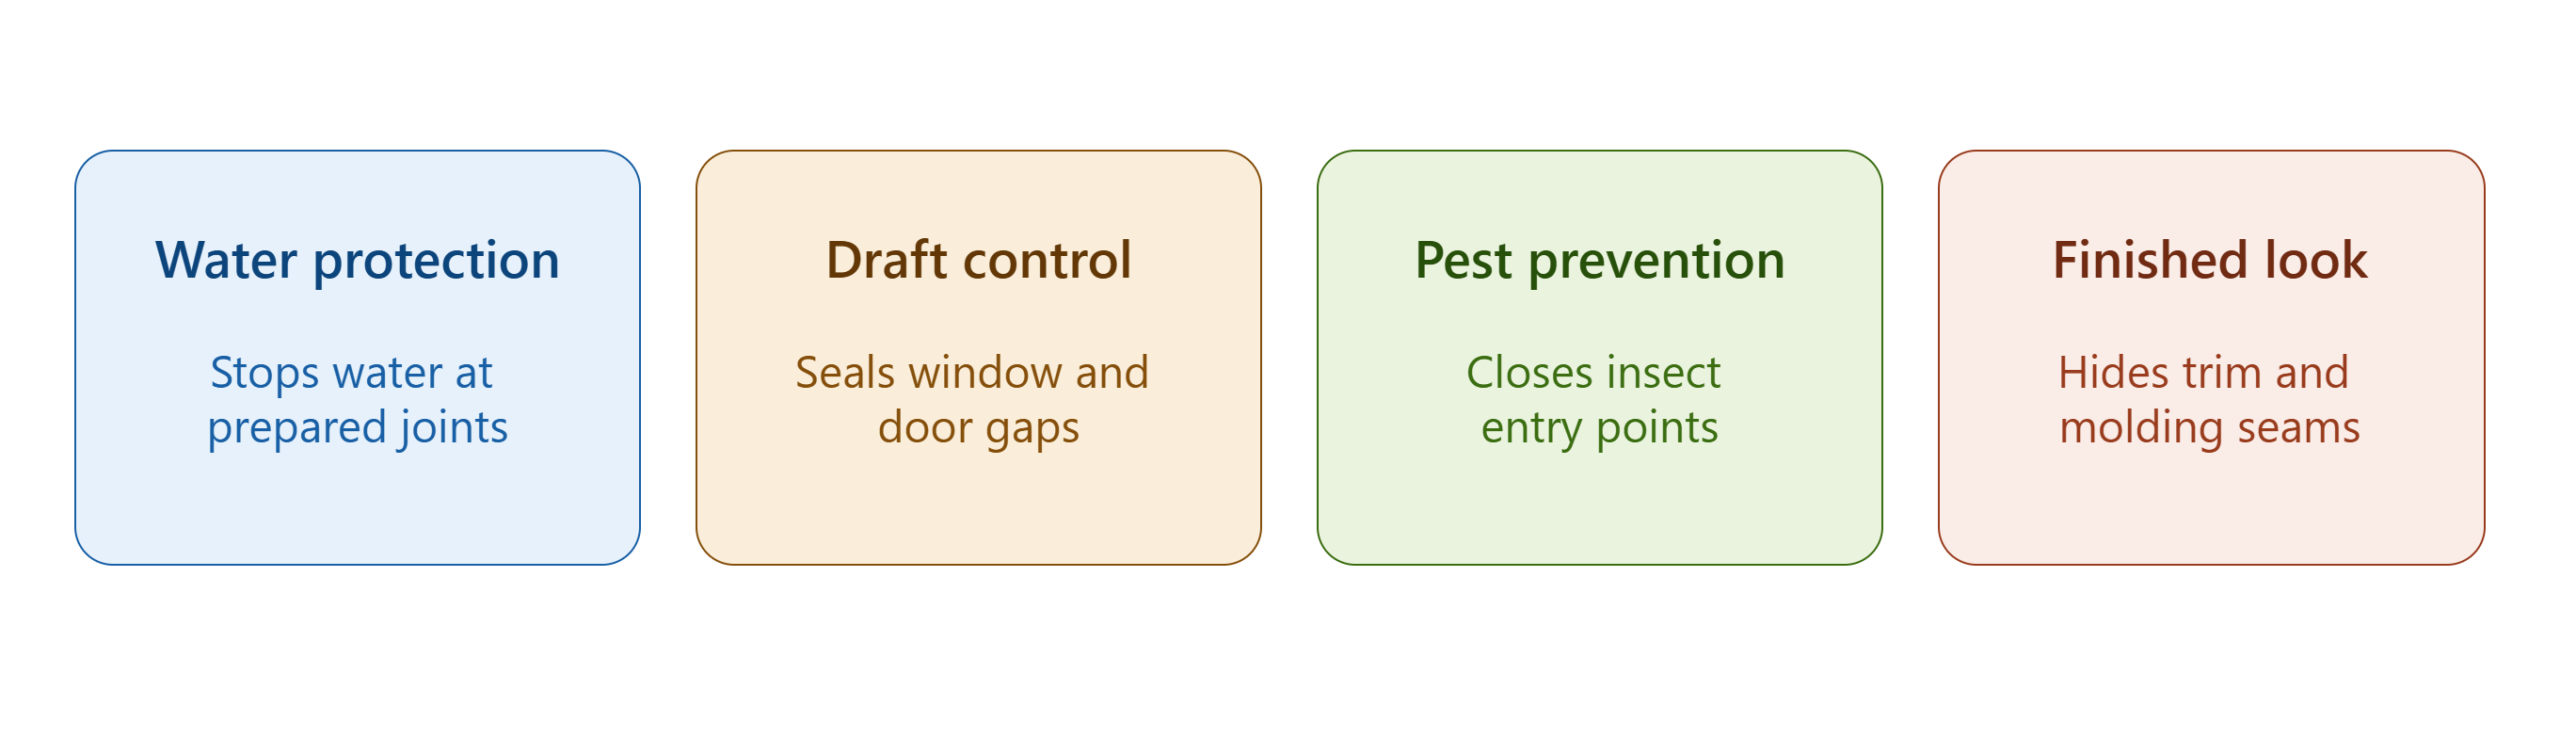
Caulk earns its place in a toolbox by doing four separate jobs at once, all from the same small bead of material.
Water protection is the big one. Properly applied caulk helps stop water from entering through joints that have been prepared and sealed correctly, which is exactly why it matters so much around tubs, showers, and sinks.
Draft control comes next. A bead of caulk seals the small gaps around appropriate window and door areas, closing off the paths that cold air and drafts use to sneak into a house.
Pest prevention is the quieter benefit. Caulk closes the small openings that would otherwise let insects find their way inside, cutting off entry points before they become a problem.
Finished appearance rounds it out. Caulk hides the small joints around trim, molding, and countertops, giving edges a smooth, clean look instead of a visible gap.
Caulk, Silicone, Sealant or Grout?
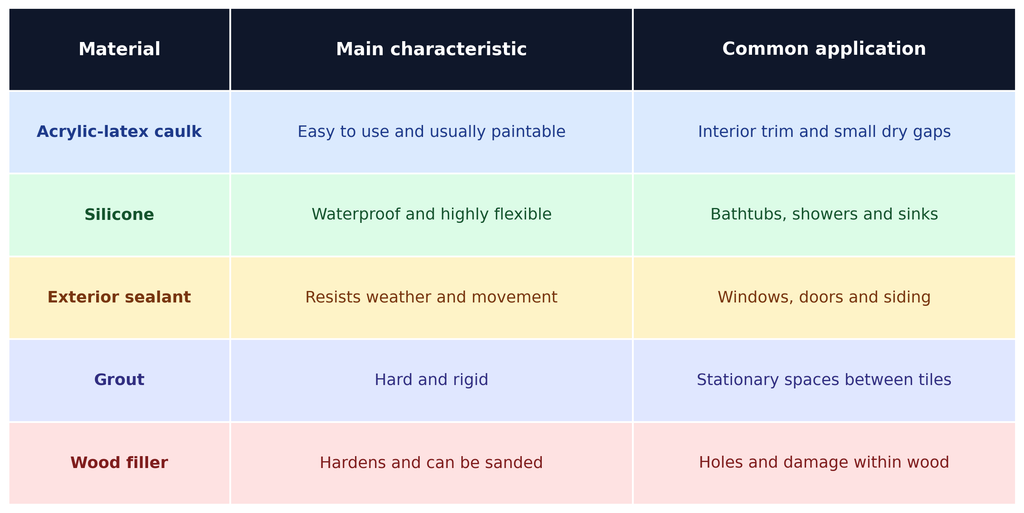
How to choose the correct caulk
Choosing the right caulk really comes down to answering two simple questions about the spot you’re sealing: how wet does it get, and how much does it move.
Start with the wet, indoor spots. A bathtub, shower, or sink needs a waterproof kitchen-and-bath silicone, and it’s worth checking the label for which surfaces it’s approved for, since not every silicone sticks well to every material like fiberglass, acrylic, or tile. These are the spots where cutting corners shows up fastest, since water sitting against a weak seal leads straight to the mold and peeling caulk problems covered earlier.
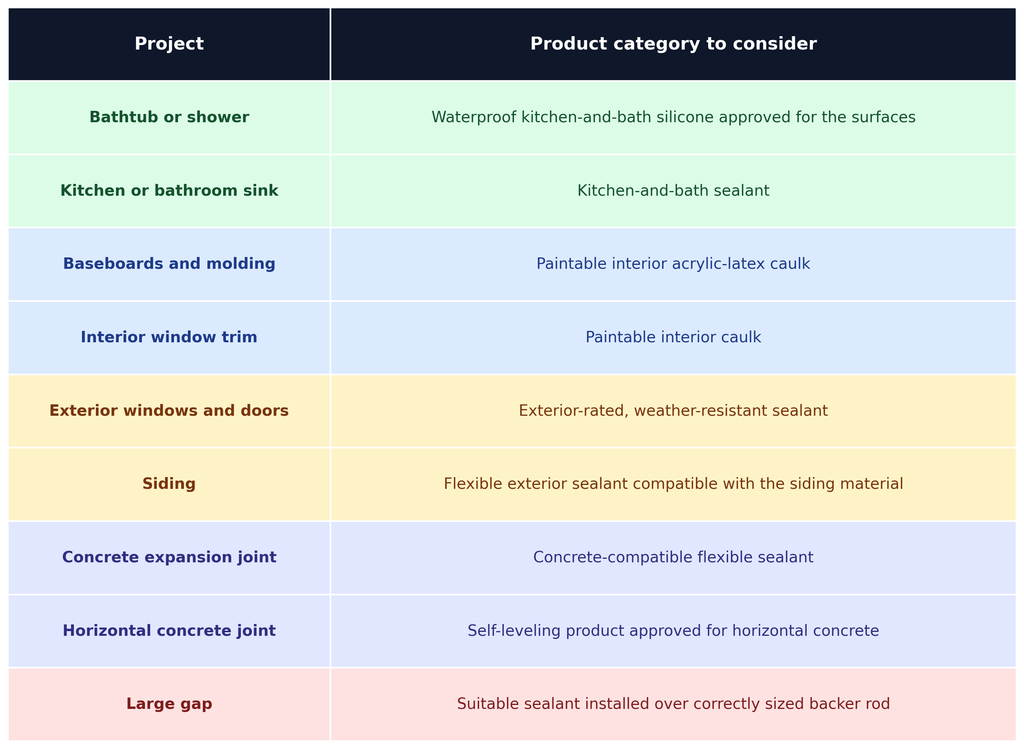
This table breaks down nine common home projects and points you to the right type of caulk or sealant for each one. Rows are color-coded by how much moisture and movement that spot deals with: green for wet indoor areas like tubs and sinks, blue for dry indoor trim, amber for exterior surfaces exposed to weather, and purple for concrete joints. The odd one out, large gaps, gets its own note since those need a backer rod before any sealant goes in at all.
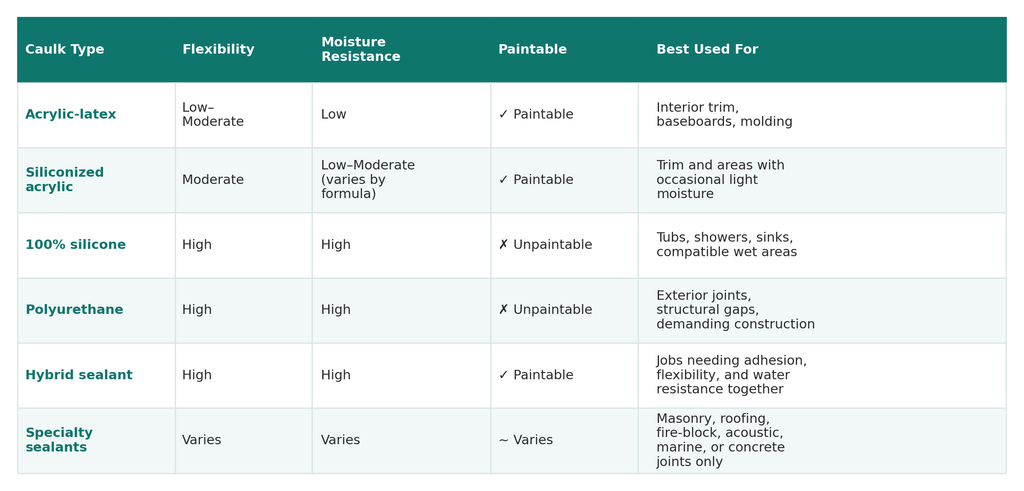
Common types of caulk
Inspect the problem before caulking
Should This Gap Be Caulked?
Not every gap, crack, or seam is a caulking job. Grabbing a caulking gun before checking what’s actually going on can trap a bigger problem behind a fresh, tidy-looking bead — which is often worse than leaving the gap alone. Before loading a cartridge, walk through these eight checks.
1. Is the opening an intended drainage path?
Some gaps are built into a system on purpose, not left there by accident. Weep holes in brick veneer, gaps at the base of a window sill, and drainage channels in siding are designed to let water escape after it gets behind a surface. Sealing one of these shut doesn’t stop water from getting in — it just stops it from getting back out, trapping moisture where it can do real damage.
2. Is there active water leakage?
If water is currently coming through a gap, caulk is a cover-up, not a fix. Caulking over an active leak seals in moisture and hides the problem from view while it keeps working behind the wall, ceiling, or floor. The leak’s source needs to be found and repaired first; caulk only belongs in the picture once the area is dry and the water intrusion itself has been resolved.
3. Is the surrounding material soft, swollen or rotten?
Press gently on the wood, drywall, or trim around the gap. If it feels spongy, gives way, or looks swollen or discolored, water has already been sitting in that material for a while. Caulking over it seals moisture inside rather than out, and gives none of the strength a solid surface would offer for the caulk to grip. Damaged material needs to be cut out and replaced before any new seal is applied.
4. Is mold growing behind the old caulk?
Dark spots, a musty smell, or staining once old caulk is pulled back are signs of mold, not just dirt. Caulking directly over mold traps it against a surface it will continue to feed on, and the new bead will likely fail again as the mold undermines it from beneath. The affected area needs to be cleaned and fully dried — and in more serious cases, professionally assessed — before it’s resealed.
5. Is the joint moving repeatedly?
Some joints shift constantly: around a bathtub that flexes slightly with use, along an exterior expansion joint, or wherever two different building materials meet and expand at different rates. A joint like this needs a caulk rated for higher movement capability, applied at the right thickness and depth. Using a rigid or low-movement product here is a shortcut to early cracking, no matter how carefully it’s applied.
6. Is the gap too wide or deep?
Caulk is meant to fill a thin seam, not a canyon. Once a gap gets too wide or too deep, a bead of caulk alone will sag, slump, or crack because it has nothing solid to bond against in the middle. Gaps like this typically need a backer rod inserted first — a foam rope that fills the bulk of the space and gives the caulk a proper surface to bond to on just two sides, which is what allows it to flex correctly instead of stretching itself apart.
7. Is flashing or another waterproofing component missing?
Caulk is a finishing seal, not a substitute for flashing, membranes, or other waterproofing layers that are supposed to be doing the heavy lifting. If flashing around a window or door is missing, damaged, or installed incorrectly, no amount of caulk on top will make up for it. In these cases, caulk is only appropriate after the actual waterproofing component has been repaired or installed.
8. Are the two surfaces compatible with the selected product?
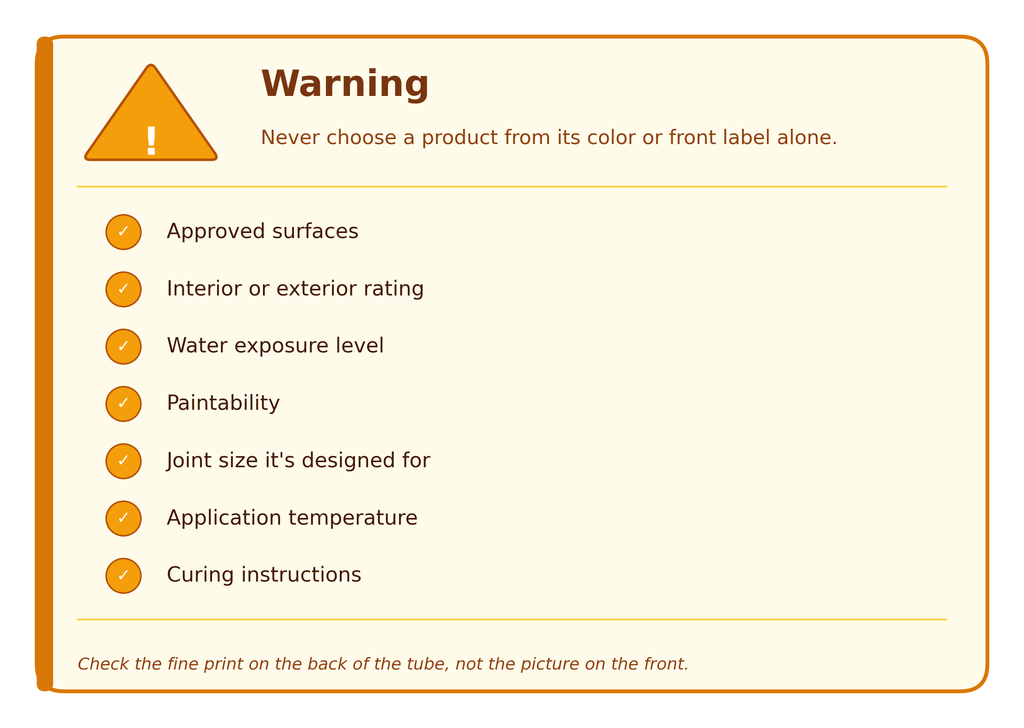
Not every caulk sticks to every material. Some silicones don’t bond well to certain plastics, fiberglass, or painted surfaces, and using the wrong product on the wrong surface can mean a bead that looks fine going on but peels away within days. Checking the label for which surfaces a product is approved for takes a minute and prevents a redo.
The takeaway
If any of these checks turn up a problem, the actual issue is water intrusion, rot, mold, movement, or a missing waterproofing component — not just a gap. Caulk should go in only once that root cause is addressed. Applied over a real problem, it doesn’t fix anything; it just hides it for a while, and the fix behind the wall gets more expensive the longer it’s covered up.
Frequently Asked Questions
Seal the nozzle as tightly as possible and follow the manufacturer’s storage instructions. An opened product can still cure inside the tube.
Replace it when it cracks, separates, deteriorates or no longer seals the joint. Its lifespan depends on the product, preparation, movement and environment.
No. Silicone is useful for compatible wet areas, but paintable acrylic or hybrid products may be more appropriate for trim and other applications.
Only if the product is labeled paintable and has reached its stated paint-ready time.
It can seal an appropriate joint, but it cannot repair broken plumbing, missing flashing or failed waterproofing.
Some people do, but a finishing tool can offer better control. Follow the product instructions and protect your skin.
New caulk usually should not be applied over loose, dirty, moldy or incompatible material. Removing failed caulk and preparing the surfaces normally produces a more reliable result.
You need one for standard cartridges. Small squeeze tubes can be used without a gun.